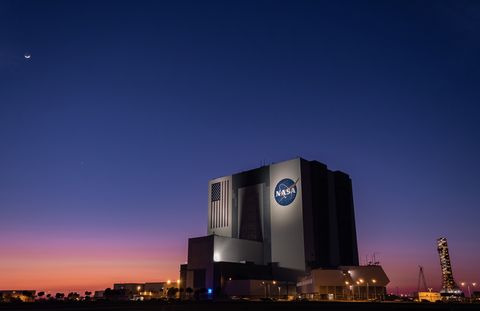
For the past 13 years I’ve photographed some challenging subjects, but rarely do I get the chance to capture a 224-foot-tall spire of metal explode with 5 million pounds of thrust. Not until we arrived at the Kennedy Space Center in Cape Canaveral in April, where a SpaceX Falcon 9 rocket towered on the launch pad ready to carry its precious payload, the TESS space telescope.
Being with the press (or being a freelance photographer) has its advantages, and I was able to place my camera some 500 feet away from the launch pad. But even at this distance rockets can be incredibly dangerous—both the exploding fuel and thunderous ignition. In certain circumstances, they can even be deadly. So I opted for a remote control setup to capture the rocket photo of my dreams while I watched some four miles away.
Here’s how I did it, and how you can do it, too.
The Most Important Tools
Advertisement - Continue Reading Below
Humans need to stay about four miles away from a rocket during launch, so you’re going to need a remote trigger. I chose the Canon 5D MK III and IV because of battery life—it's so good, I could have easily left the camera at the launch site for days. I tested a mirrorless Fuji X camera in standby mode, but because the sensor remains “charged” while the camera is sleeping, I could only get 8 hours max even with two batteries in the grip.
Another critical feature was the Canon's ability to shoot at a burst rate without filling up the buffer. I got the fastest write speed card that would work with the camera and tested burst rates to make sure it could take one photo after the next throughout the entire sequence without stopping.
You'll also need the remote MIOPS Smart Trigger. The trigger has a mode that activates the camera’s shutter when it detects a sound above a set decibel level. Since the rocket is very loud for about 30 seconds as it ascends to space, you can use that to trigger a series of photos during that time.
The MIOPS Smart Trigger has several modes that allow you to operate the camera using a variety of inputs, including lightning or a laser beam. The Canon 5D MK III and IV have the three-pin Canon trigger input. MIOPS calls this cable the “C1 Cable”. They make cables for several camera brands to connect to your camera using the remote trigger port, so be sure to choose the right one.
The MIOPS trigger has a range of audio decibel levels to trigger the camera from what seems like a very sensitive pin drop, all the way up to ear-piercing levels. For the Falcon 9 TESS launch I set the trigger to 20 dbs. This makes sure the trigger doesn't go off until the rocket is launching. Lower level sounds like people talking or cars driving by could set if off wasting battery and memory card space.
The trigger has enough battery capacity to last a few days and my cameras could also stay in sleep mode for several days on a single battery. We were brought out to the launch site to set up our cameras at 10:00 am and the launch wasn’t until 6:32pm. Because launch windows depend on the mission, a rocket can launch at any time of the day. For any minor problem with the equipment or weather related issues, the launch could be scrubbed completely and possibly rescheduled a few days later.
In my case the launch was scrubbed and we were given the option to retrieve our cameras and reload batteries or leave them setup until the next day. I prudently chose to retrieve my cameras and refresh everything with new batteries.
Getting Your Camera Ready for Lift-off

Now that you have a safe way to trigger the camera, DO NOT leave the camera on automatic settings. Setting the camera to auto-focus could make it hunt for focus during a critical time, which could result in missed shots. Auto shutter and aperture settings could result in over- or underexposed images and possibly motion-blurred shots, which you definitely don’t want.
Take full control of all the settings and get the image you want. You will have about 15-20 seconds of action in the frame depending on its size, so be sure the burst rate and cameras memory card can handle a continuous series of photos for that time without stopping to buffer.
Best Camera

Canon 5D Mark III
The Canon 5D MK III and IV had the battery life I needed for this shoot. I could have easily left the camera at the launch site for days if and when there are delays. It could also shoot at a burst rate without filling up the buffer in the camera—a must have for rocket photography.
Best Remote Trigger

MIOPS Smart Camera Trigger
The MIOPS smart trigger has a mode that activates the camera’s shutter when it detects a sound above a set decibel level. Since the rocket is very loud for about 30 seconds as it ascends to space, you can use that to trigger a series of photos during that time.
Best Travel Tripod

Bonfoto Travel Tripod
You want great photos, but you also want your camera to survive the experience. I would recommend getting a tripod that can handle more than the weight of your particular camera and lens setup.
Best Lens Warmer

Protage Electronic Lens Warmer
The electronic lens warmer is a strap that heats up with low power voltage making sure your camera is ready to fire photos no matter the conditions.
Best Portable Battery

Anker 20,100mAh battery
And you'll need to power that warmer with a USB battery in case your away from your camera for hours at time. Just remember: more mAh the better.
Advertisement - Continue Reading Below
Manual Mode
Set the camera based on the exposure you want for launch time and date. For my wide angle compositions, I set the exposure for the exhaust plume and the rocket itself. I wanted a deep depth of field, so I set the aperture to f/10. Since it was 6:30 pm in April, the sun was still bright but a little low in the sky and behind the rocket to the right. I set the ISO to 200 and shutter speed to 1/1600th to freeze the motion but still capture a deep blue sky. I got a tip from other photographers that the shutter speed should be above 1/1000th to freeze the motion. I based the other settings off that to get to the ballpark exposure for that same time of day.
My tighter shots of the rocket engines and exhaust flame needed a darker exposure setting to show more detail in the bright flame. I went up to 1/6400 for these and opened my aperture to f/7 and ISO 200. This allowed me to get a little more detail in the flames but still see the SpaceX logo on the side of the rocket.
Important: Be sure to not use filters. UV filters, ND filters, or polarizers can not be used. Even AR coated filters will reflect the extremely bright light from the exhaust back into the lens and cause ghosting or a double image.
Manual Focus
If the rocket is on the launch pad when you set the cameras, use the live view mode to zoom way in to fine tune the focus on the rocket. If they only allow you to setup before the rocket is in position on the launch pad, try to determine where it will be and focus on the closest part of the launch pad to where the rocket eventually be positioned.
Once the focus is set, use lens bands or tape the lens focus ring and the zoom ring to prevent accidentally knocking the lens out of focus and preventing zoom lens creep. After you have dialed in the zoom for your composition and carefully focused, secure those positions with a thick rubber band or gaffer's tape.
Burst Mode
Depending on your camera model you may run into a buffer issue if you set the camera to a fast burst mode. The Canon 5D MK III and IV have a continuous burst mode S (slow) that allows more than enough photos in series without stopping to buffer. Set your camera to the correct burst speed that allows you to shoot without buffering.
Shoot RAW
Shooting in RAW mode will give you a much larger range of exposure adjustments during post processing. I like to use Adobe Lightroom to process my photos, and editing the RAW files in Lightroom will allow you to push the white balance and exposure much further because the file has a much broader range of data compared with a .jpeg file.
RAW also gives you more control over specific ranges in the highlights and shadows separately. What looks like a blown out highlight can be recovered if it is not too far past the correct exposure. You can also pull out detail in the shadow areas like the logo on the side of the rocket.

Advertisement - Continue Reading Below
Keep the lens warm
If the rocket launch is scheduled in the early morning, dew can form on the lens and fog the image. There are a couple of options to keep the lens warm and the fog off your lens. Chemical hand warmers attached around the lens with rubber bands or tape will work well. Just be sure you purchase ones that will last through the night and morning.
The second option is an electronic lens warmer. The electronic lens warmer is a strap that heats up with low power voltage. You will need to run the warmer with a USB battery that works for the system. This lasts about 7 or 8 hours on a 8,000mAh USB battery pack, but the advantage is you can extend the time with a large battery pack. Just be sure to test the time you get with the battery pack you plan to use. In my case, the launch was at 6:30 p.m. so there was no chance of the lens fogging.
Secure the tripod
You want great photos, but you also want your camera to survive the experience. The forces from a rocket launch could easily knock the camera over, which you don’t want during those key photographic moments. I used tent stakes and nylon cord tied to the tripod legs. You can also spread the legs of most tripods to get it into a low wide stance adding stability. I would recommend getting a tripod that can handle more than the weight of your particular camera and lens setup.

Cover the camera and trigger
You’ll also need to keep rocket exhaust, debris, rain, or water from the launch off your cameras. You can use a plastic bag or a rigged plastic box with an opening in one side that does not obscure the shot. I’ve seen people use a plastic mailbox with a hole cut in the door but any type of plastic or metal container the right size will work.
I used some 6mil plastic zipper bags. Next time I plan to set up a plastic box that is large enough for the camera attached to a bracket inside with a quick release plate attached to the bottom of the box that attaches to the tripod head.
Advertisement - Continue Reading Below
Another reason for the box could depend of the rocket fuel type and water spray on the launch pad. My cameras were positioned about 700 feet from the rocket at SpaceX Launch Complex 40 with the wind blowing slightly away from the cameras, but the exhaust and water still ended up on the front element of the lenses. We were originally scheduled to pick up the cameras an hour after launch, but we weren’t able to return to the site until the next morning. By this time, residue from the exhaust plume dried to the lens but thankfully wiped clean with some lens fluid.
The next day we were bussed back to the launch site to retrieve our cameras and hopefully some photos of the launch. Luckily my camera endured the blast (some cameras aren’t always so lucky) and did not get blown away into the bushes. I was very excited to see that the camera and remotes still had power. Not only had everything functioned properly, but I had captured a series of photos at the correct exposures.
Everything worked out perfectly for me and I got all the shots I wanted, but here’s a few tips and tricks I learned for when I head to the launch pad next time:
- Construct the container to also protect the camera from the elements. Even though this was an afternoon launch and the weather was perfect, things could be very different for other launches.
- Limit the number of cameras to just one or two. I had 3 DSLRs and a GOPRO setup in various locations and at various focal lengths to cover all my bases. That pushed my setup time to the 30 minute max. I ended up rushing through the setup for each camera with no time to spare.
- Prepare the tripods and cameras the night before. I brought everything out to the launch site neatly packed in a camera bag ready for assembly on location. I thought the 30 mins we were given to setup would be more than enough time, but it nearly wasn’t. I would setup everything including the steaks tied onto the tripod legs ready to push into the ground. This would allow more time to think about the position of the camera.
- Try a much darker exposure. Even shooting RAW there is a limit to how far you can push the exposure. The rocket exhaust is a dramatic display and a darker exposure helps capture more details in the flame.
Photographing a rocket launch is a fun challenge with a surprising amount of luck involved. Like a rocket launch itself, unforeseen problems can cause even an experienced photographer to miss that perfect shot. At least you have a perfect excuse to return to Cape Canaveral ASAP.

Bagikan Berita Ini


0 Response to "How To Photograph a Rocket Launch"
Post a Comment